
Blogs
How to Clean Truck Engine Bays Properly
Jul
A truck that works hard usually shows it first under the bonnet. Dust, oil mist, road film and built-up grease settle into every corner of the engine bay, and before long even basic inspections get harder than they need to be. If you want to know how to clean truck engine bays without creating electrical issues or pushing grime deeper into sensitive areas, the method matters more than brute force.
For workshops, fleet teams and owner-operators, a clean engine bay is not just about presentation. It helps you spot leaks earlier, makes servicing easier and leaves a better standard of finish when the vehicle goes back on the road. The key is using the right chemistry, the right pressure and a process that suits the age and condition of the truck.
Why engine bay cleaning needs a careful approach
Truck engine bays collect a different type of contamination from body panels or wheels. You are dealing with baked-on grease, diesel residue, oily dust, salt, road grime and sometimes product overspray from previous maintenance. Some areas respond well to a water-based degreaser. Others need a more controlled approach because seals, connectors and exposed electrical components may already be tired.
That is where many cleaning jobs go wrong. Too much water pressure can force moisture into places it should not be. Overly aggressive solvents can stain plastics, dry out rubber or leave surfaces looking worse than before. On newer trucks, sensor-heavy engine bays often need a lighter touch. On older units, the issue is usually brittle wiring, cracked covers and years of neglected build-up.
Before you clean truck engine bays, assess the condition
The safest way to clean is to inspect first. Start with the engine off and cool. A hot engine bay can flash off chemicals too quickly, leave marks on surfaces and increase the chance of burns for your staff.
Look for exposed wiring, damaged conduit, loose battery covers, cracked fuse box lids and any obvious fluid leak. If there is fresh oil around gaskets, injector lines or hydraulic fittings, note it before you wash anything away. Cleaning should support maintenance, not hide faults.
It also pays to check how much build-up you are actually dealing with. A lightly dusty engine bay might only need a mild cleaner, agitation and low-pressure rinse. A neglected fleet unit with caked grease around the block, crossmembers and inner guards will usually need a staged clean rather than one heavy application.
What you need for the job
Professional results usually come down to matching the cleaner to the contamination. In most cases, a quality engine cleaner or degreaser, soft and medium-detail brushes, clean microfibre cloths, compressed air or a blower, and controlled water pressure are enough.
You may also want protective covers or plastic bags for highly exposed electrical points, aftermarket electronics or open-air filters. This is not always necessary on every truck, but if a component already looks vulnerable, covering it is a sensible safeguard.
Avoid the temptation to rely on one harsh product for everything. A strong degreaser can save time on greasy metal surfaces, but it may be too much for painted areas, decals or some plastics. That trade-off matters if you are cleaning customer vehicles or fleet assets where finish quality counts.
How to clean truck engine bays step by step
1. Start dry
Begin by removing loose debris by hand. Leaves, dust and compacted dirt around the cowl, radiator support and hinges should come out before any liquid goes in. If you skip this, you often end up turning dry grime into muddy residue that spreads across the whole bay.
A vacuum, blower or compressed air helps here. This step alone can make the chemical stage faster and more consistent.
2. Protect what needs protecting
Cover exposed intakes, sensitive aftermarket wiring, alarm sirens and any damaged electrical housings. Factory-sealed components are usually designed to cope with normal moisture, but damaged or modified areas are a different story.
If the truck has obvious electrical issues already, be conservative. Cleaning may still be possible, but reduce water use and focus more on wipe-down methods.
3. Apply cleaner to the dirtiest areas first
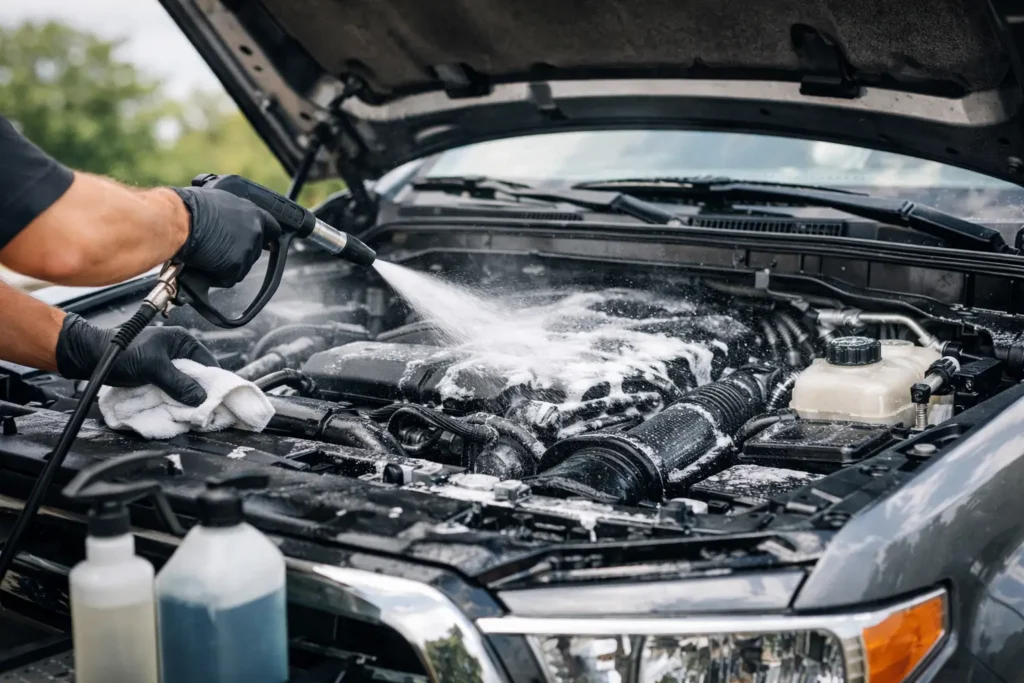
Spray your engine cleaner or degreaser onto greasy zones such as rocker covers, the front of the engine, mounts, inner guards and around the radiator support. Work from the lower grime-heavy areas upward where practical so you can see coverage and avoid missing heavily soiled sections.
Do not soak everything blindly. Controlled application is better, especially around belts, connectors and labels. Let the product dwell long enough to break down grease, but do not allow it to dry on the surface.
4. Agitate where needed
This is the step that separates a quick splash-and-rinse from a proper clean. Use brushes to loosen stubborn deposits around castings, hose junctions, brackets and tight corners. Soft brushes suit plastics, covers and painted areas. Firmer brushes are useful on metal parts with thick grease.
If an area does not come clean on the first pass, repeat the application rather than attacking it with more pressure. That is usually safer and gives a better finish.
5. Rinse with control, not force
When rinsing, low to moderate pressure is the safer option. You want to carry away loosened contamination, not drive water into connectors or strip protective dressings from surrounding parts. Keep the spray angle sensible and avoid directing water straight into electrical plugs, alternators or fuse housings.
On some trucks, a pressure washer can be used carefully at a distance. On others, particularly older vehicles or engine bays with visible wear, a hose, pump sprayer or damp-cloth method is the better call. It depends on the truck, the contamination level and the condition of the components.
6. Dry thoroughly
Drying is not optional. Use compressed air or a blower to push water out of crevices, around coil packs, under covers and along seams. Follow with clean cloths where needed.
This stage reduces the risk of water marks and helps prevent the common problem of residual moisture sitting in plug recesses or connectors. If the truck is going back into service quickly, proper drying is even more important.
7. Finish exposed surfaces properly
Once clean and dry, plastic and rubber surfaces can be dressed lightly if a finished presentation is required. For retail detailing or dealership prep, that can lift the overall standard significantly. For fleet and workshop use, many operators prefer a clean, natural finish without excessive gloss.
That choice comes down to the vehicle’s role. A show-ready unit and a linehaul fleet truck do not always need the same finish standard.
Common mistakes when cleaning engine bays
One of the biggest mistakes is cleaning a hot engine. Products dry too fast, staining becomes more likely and safety drops straight away. Another is using maximum pressure because the grime looks heavy. Pressure can remove surface dirt quickly, but it can also cause the kind of issue that turns a cleaning job into downtime.
Using the wrong chemical strength is another common problem. Too mild, and you waste labour repeating the job. Too strong, and you risk dulling finishes or damaging materials. This is why professional-grade cleaners matter – they are designed to perform consistently when used as directed.
There is also the issue of doing too much in one hit. On badly neglected engine bays, one careful clean may reveal areas that need a second treatment. That is normal. Trying to get every bit of old grease off in one aggressive pass is usually where damage happens.
Engine bay cleaning for fleets and workshops
For businesses managing multiple trucks, consistency matters as much as results. The best approach is to standardise the process so each vehicle is assessed, cleaned and dried the same way. That keeps labour predictable and reduces the chance of avoidable electrical problems.
It also makes product selection easier. A professional supplier such as SuperShine can help workshops and fleet teams match cleaners, degreasers and accessories to local operating conditions, whether the issue is road film, heavy grease, dust or mixed contamination from off-road and highway work.
In a fleet setting, engine bay cleaning is often most effective when paired with routine servicing. That way, leaks can be identified and repaired early instead of hidden under months of grime.
How often should you clean a truck engine bay?
There is no single schedule that fits every truck. A highway unit with light exposure may only need periodic cleaning. A truck working construction, agriculture or quarry routes will usually need attention far more often.
A good rule is to clean often enough that inspections stay easy and contamination does not become heavily baked on. Light, regular cleaning is generally safer and faster than waiting until the engine bay is heavily fouled.
If your operation presents vehicles to clients, tenders or site audits, appearance may also justify a more frequent schedule. Cleanliness signals maintenance discipline, and that matters in commercial environments.
A clean engine bay should make the next service easier, not create the next fault. If you approach the job with the right products, sensible pressure and a bit of patience, you will get a better result every time – cleaner components, easier inspections and a truck that looks properly cared for under the bonnet.
