
Blogs
How to Apply Car Polish for a Clean Finish
Jul
Paint that looks dull after a wash is not always dirty. Road film, fine scratches, oxidation and old protection can leave the surface flat even when the vehicle is clean. Knowing how to apply car polish correctly helps restore clarity without creating fresh marks, wasting product or cutting more paint than necessary.
For workshops, detailers and serious vehicle owners, polishing should be a controlled correction process, not a quick wipe-on job. The right method depends on the paint condition, the polish type and whether the work is being completed by hand or machine.
Know what car polish is designed to do
Car polish is made to refine the paint surface. Depending on the formula, it can remove or reduce light oxidation, wash marring, swirl marks and minor scratches by gently levelling the clear coat around the defect. It improves gloss because a smoother surface reflects light more evenly.
Polish is not the same as wax or paint protection. Wax, sealant and ceramic-style protective products sit on or bond to the surface to provide water repellency and protection from contamination. Polish corrects the surface first. Some all-in-one products combine mild polishing action with protection, which can be practical for regular fleet presentation, but they will not provide the same correction as a dedicated compound and polish process.
Be realistic about the defects in front of you. Light swirls and dullness are usually suitable for polishing. Deep scratches that catch a fingernail, peeling clear coat, stone chips and failing paint need a different repair approach. Aggressive polishing will not fix them, and may make a thin or compromised paint system worse.
Prepare the vehicle before applying car polish
Polishing dirty paint is one of the quickest ways to add scratches. Every panel must be properly washed, rinsed and dried before the polish touches it. Pay attention to lower doors, guards, bumpers, mirror housings and behind wheel arches, where grit tends to collect.
If the paint feels rough after washing, remove bonded contamination before polishing. Iron fallout, tar spots, overspray and industrial grime can interfere with pad movement and produce an uneven finish. Use the appropriate decontamination product for the contamination, then rinse or wipe down as directed. A clay treatment can also be useful where the paint still feels contaminated, provided it is used with adequate lubricant and followed by polishing.
Work in a shaded, well-ventilated area on cool panels. Direct sun and hot paint can cause polish to dry too quickly, reduce working time and make residue difficult to remove. For commercial work, good lighting matters just as much as the product. Strong inspection lighting reveals swirl marks and missed areas that ordinary workshop lighting can hide.
Before starting, mask unpainted plastic trims, rubber edges, badges and sharp panel lines where needed. Polishing residue can stain porous trim, while panel edges often carry less paint than broad, flat areas. Open doors, the bonnet and the boot to check for build-up around edges before handing the vehicle back.
Choose the polish, pad and method for the paint
Start with the least aggressive combination that can achieve the required result. A finishing polish with a soft foam pad may be enough for a well-maintained vehicle with light wash marks. Moderate defects may require a medium-cut polish and firmer pad. Heavier correction usually calls for a cutting compound followed by a refining polish to restore clarity.
A dual-action machine polisher is generally the safer and more efficient option for regular professional work. Its oscillating movement is forgiving compared with a rotary machine and makes it easier to achieve consistent correction across large panels. Rotary polishers can cut quickly, but they require sound technique, careful heat control and appropriate paint knowledge. They are not the tool to learn on with a customer vehicle.
Hand application has a place on small areas, intricate panels and light enhancement jobs. It is also useful when working around badges, door handles and tight contours. However, hand polishing will not reliably remove widespread swirls from a full vehicle. The effort is high, correction is limited and results can vary from panel to panel.
Pad condition is critical. A loaded, dirty pad generates excess heat and can drag spent polish across the paint. Use clean pads throughout the job, clean them frequently during longer corrections and separate cutting, polishing and finishing pads. The same discipline applies to microfibre towels. A clean, high-quality towel is far less likely to reintroduce marks during wipe-off.
How to apply car polish by machine
Begin with a test spot on a representative section of paint, usually a small area on the bonnet, boot lid or upper door. This step confirms whether the product and pad combination are delivering the correction and finish required. It also prevents committing to a full vehicle process that is too mild, too aggressive or simply inefficient.
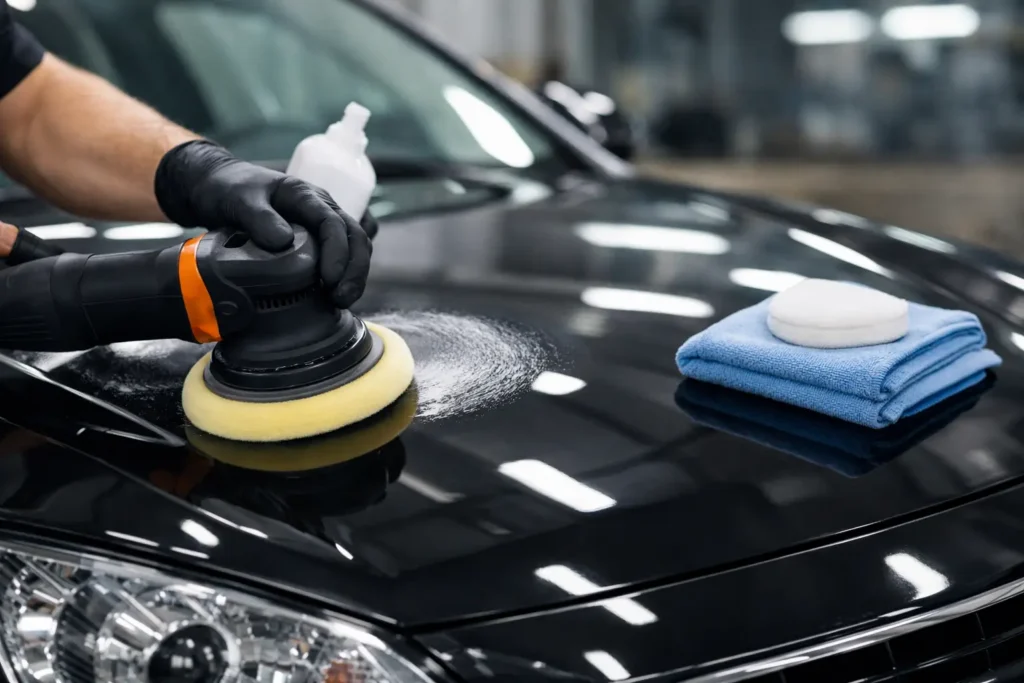
Prime the pad lightly for the first pass, then apply a small number of polish drops. Place the pad flat against the panel before starting the machine to avoid sling. Spread the product at low speed across an area roughly 40 cm by 40 cm, then increase to the working speed recommended for the machine and polish.
Keep the pad flat and use slow, overlapping passes in a cross-hatch pattern. Move left to right, then up and down, overlapping each pass by around half the pad width. Apply moderate, even pressure during the correction phase, then reduce pressure for the final passes. Let the abrasive do the work. Forcing the machine or racing across the panel generally creates poor correction and inconsistent gloss.
Most modern polishes are worked until they turn clear or begin to thin out, rather than until they dry completely. Product behaviour varies, so follow the label directions. Wipe the section with a clean microfibre towel, inspect it under proper lighting and check that the defect reduction is genuine. Some products contain gloss-enhancing oils that can temporarily mask marks, so a panel wipe may be required for an accurate inspection before applying protection.
Avoid lingering on body lines, raised edges and corners. These areas are more vulnerable to strike-through, especially on older repainted panels. Keep the machine moving, monitor panel temperature with your hand and reduce pressure around contours.
Applying polish by hand on small areas
Use a clean foam or microfibre applicator and apply a small amount of polish. Work a small section with controlled, overlapping strokes rather than large circles. Straight or cross-hatch movements make coverage easier to track and reduce the risk of uneven pressure.
Work the polish until the manufacturer’s recommended point, then remove residue with a clean microfibre towel. Inspect before moving on. Hand application is particularly useful for light scuffing around door handles, narrow pillars and painted areas that cannot be safely reached with a machine.
Remove residue properly and protect the finish
Do not allow polish residue to sit on the paint longer than necessary. Fold the microfibre towel into quarters, wipe gently and rotate to a clean side as product builds up. If residue smears, use a fresh towel rather than adding pressure. Heavy pressure with a saturated towel can create the very marring the polish has just removed.
Once the finish has been inspected and confirmed, apply a suitable protective product. This is the step that helps preserve the improved gloss and makes future washing easier. The best option depends on the vehicle’s operating conditions, wash routine and desired maintenance interval. A working ute, dealership vehicle, prestige car and heavy transport unit may all need different levels of durability and application speed.
For fleet and workshop teams, consistency is often more valuable than chasing maximum correction on every panel. A documented process using compatible wash chemicals, polishes, pads and protection products produces predictable results, reduces rework and helps staff maintain presentation standards across multiple vehicles.
A polished finish is only as good as the washing process that follows. Use clean wash media, appropriate shampoo dilution and separate tools for wheels and paintwork. Good maintenance protects the correction work, keeps the vehicle presentable for longer and means the next polish can be a light refinement rather than a major paint correction job.
